
At this point in the series, I’ve laid out the general concept for how neural networks are composed and how they can utilize interconnected layers of neurons to make predictions. In this post, we’ll check out how to compute the exact values of neurons and begin to lay down some code for a simple neural net.
A few notes about neurons
Before we dive into computing the values of neurons, there are a couple other important components that I’ve left out until now: weights and biases.
First, we’ll start with weights. A neuron’s weight is a number that represents the strength of the neuron’s connection to its input.
Here’s a model:

As you can see, there’s one neuron (the red circle) connected to an input neuron. The line between them (\(w_0\)) represents the neuron’s weight.
Like I said before, the weight is a relatively low number that represents the strength of the connection between a neuron and it’s inputs. More generally, a neuron’s weight is a measure of how much its input influences its output.
Secondly, we’ll talk about the bias.
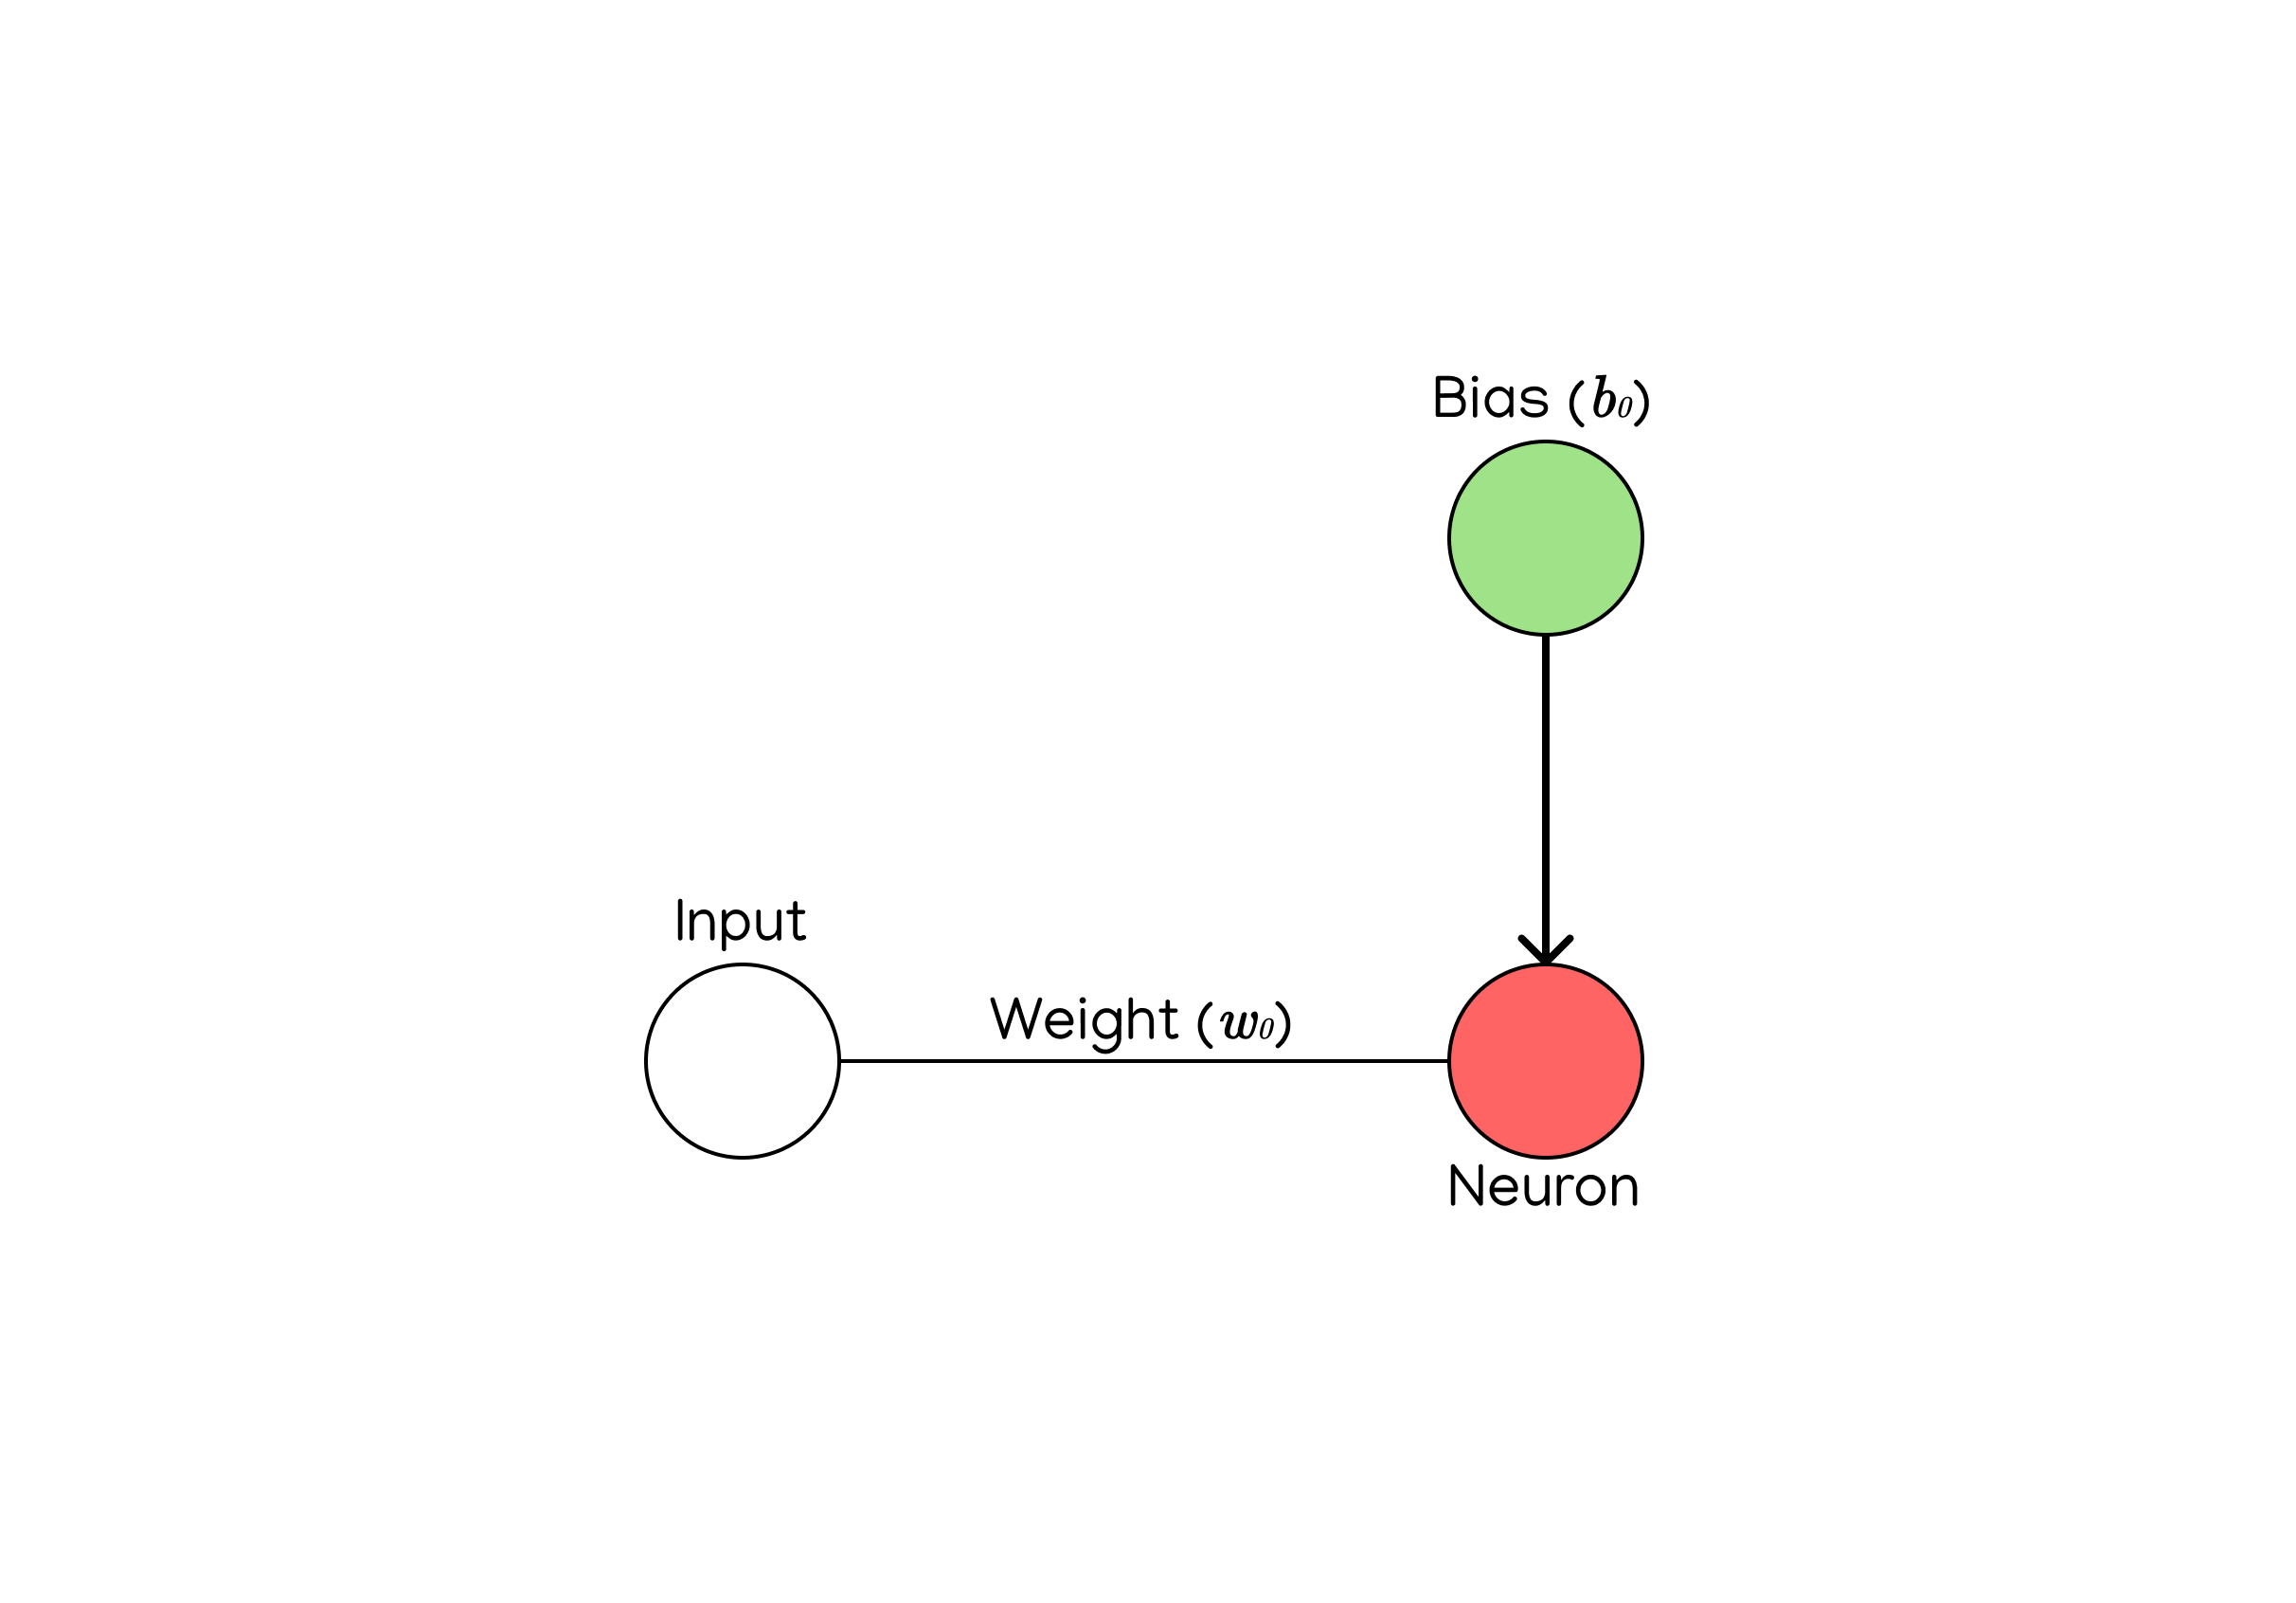
Though I’ve chosen to represent the bias with a filled green circle (\(b_0\)) in the example image above, the bias is not a neuron, nor is the connection between the bias and the neuron a weight. Instead, a neuron’s bias is just a constant value that is used to offset the neuron’s output during computation. It’s similar to the variable \(b\) for the linear function \(y=mx+b\), and it’s used to adjust the barriers of the neuron’s output. The purpose of the bias will become more clear after we get into computing and programming neurons.
Calculating the value of a neuron
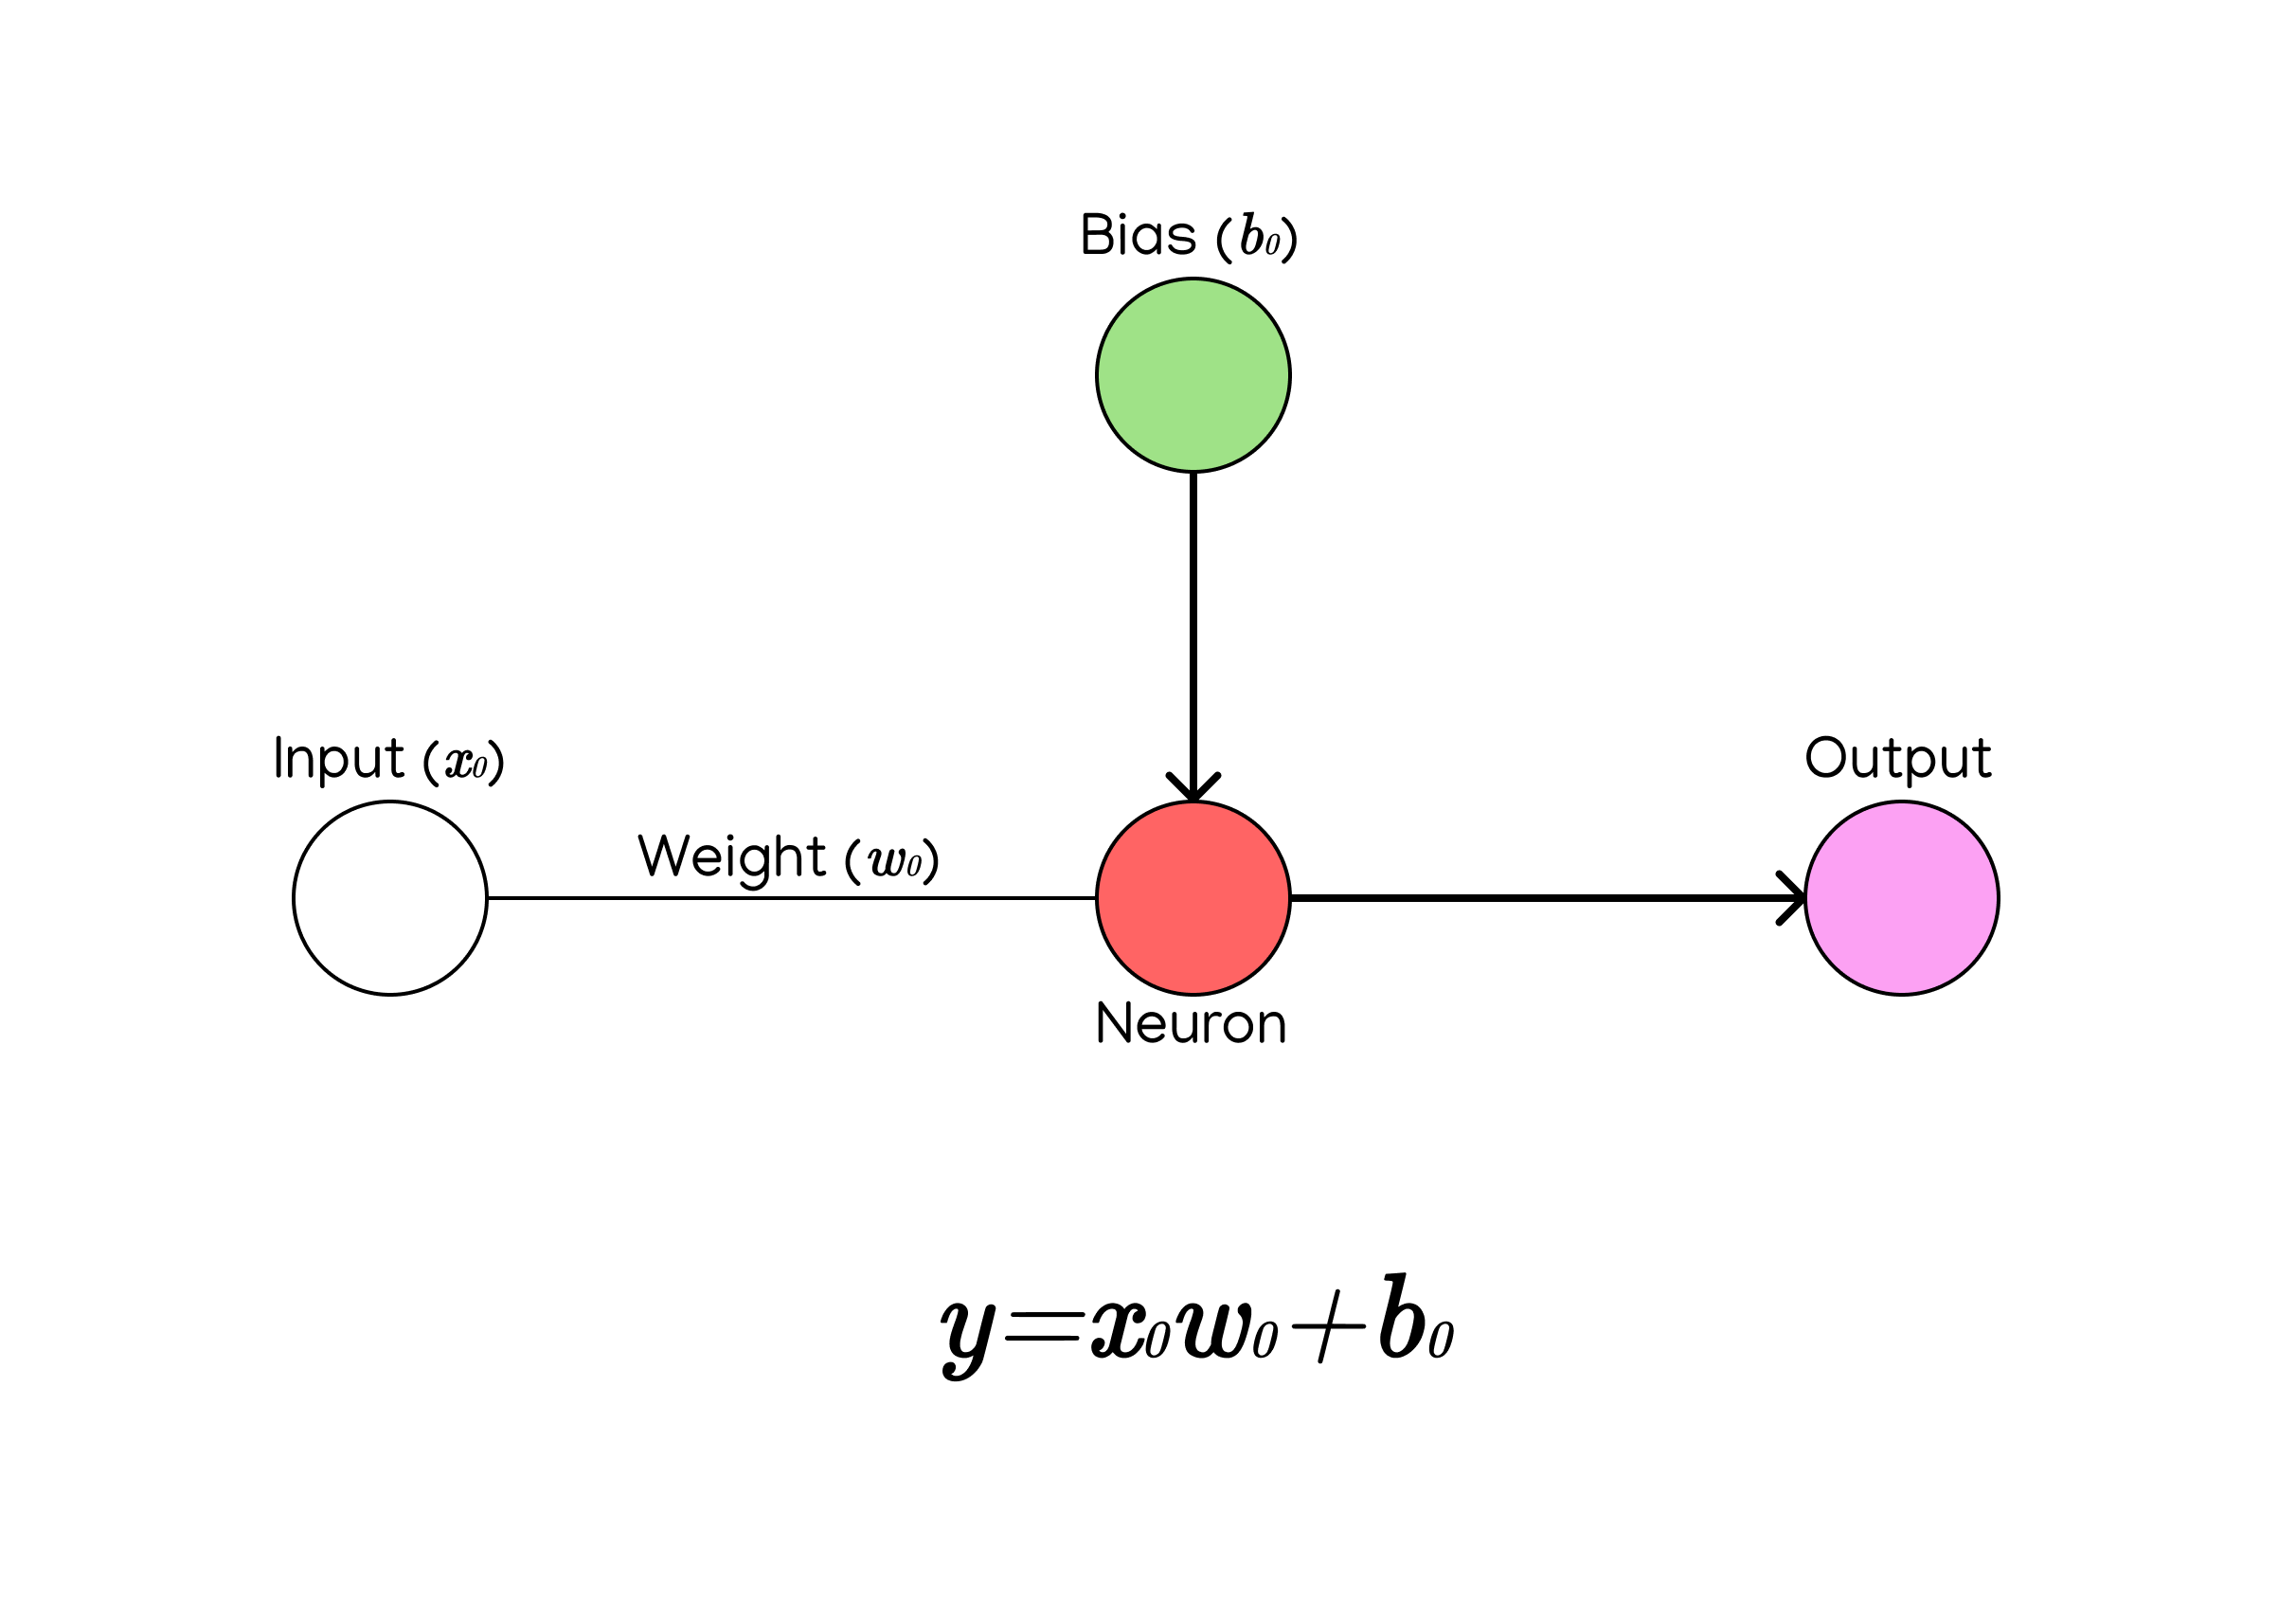
As you can see in the graphic, there is a fairly simple formula to compute the value of a neuron:
$$ y = input * weight + bias $$
The input is represented in the graphic by the value \(x_0\), the weight is represented by the value \(w_0\), and the bias is represented by the value \(b_0\).
To find the neuron’s value, we just multiply the neuron’s input and weight together (\(x_0 * w_0\)) and then add the bias (\(x_0 * w_0 + b_0\)).
Breaking it down, we can easily recognize the functions of the weights and biases that I talked about earlier.
Remember when I said:
a neuron’s weight is a measure of how much its input influences its output
That’s why we multiply the weight by the input - because it effectively has the power to scale our input up and down.
And remember this?
a neuron’s bias is just a constant value that is used to offset the neuron’s output during computation
That’s why we add the \(b\) value at the end - because it shifts the entire value of the neuron up or down.
But what if a neuron has multiple inputs?
Think back to the following model from Part 1:
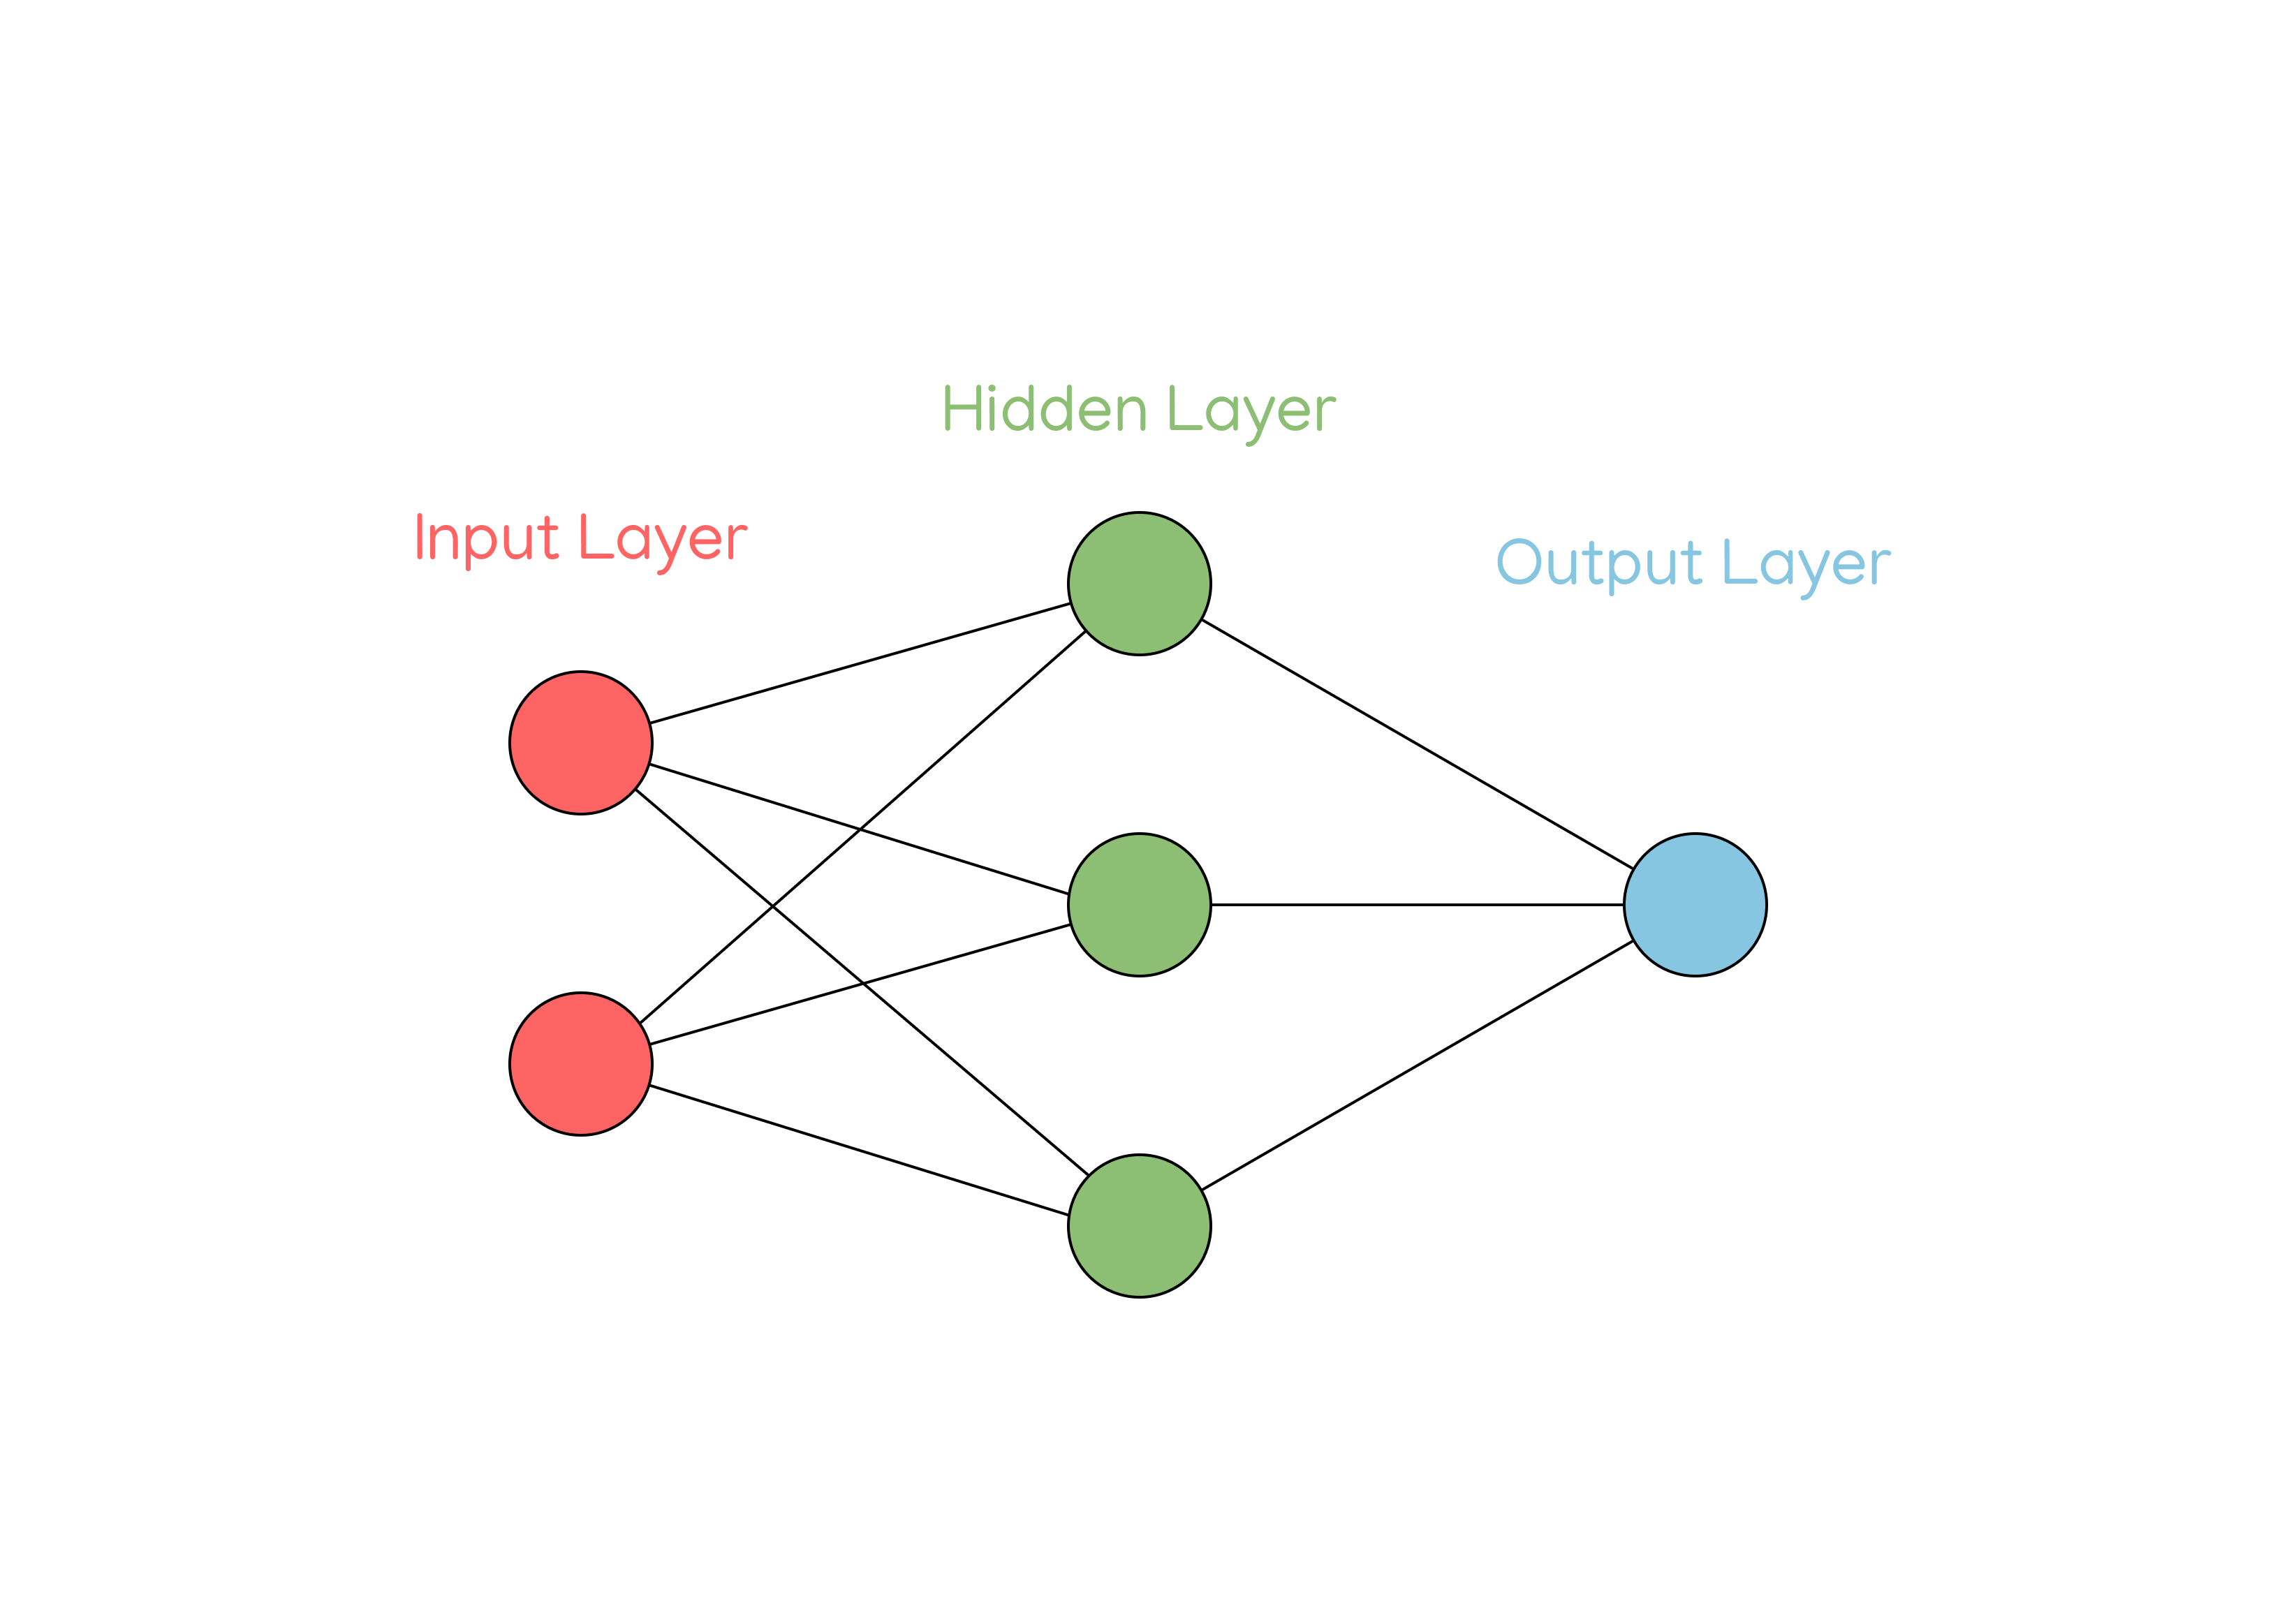
As you can see, all of the neurons in the hidden layer have two inputs, not just one. You’ll also notice that they each have two weights as well, that correspond to the two inputs.
So, to calculate the value of a neuron with multiple inputs, we multiply each of its inputs by their respective weights, get the sum, and then add the bias.
The formula looks like this, where \(n\) is the total number of inputs to a neuron:
$$ y=b+\sum^{n}_{i=0}x_i * w_i $$
For example, take the following neuron with 2 inputs and 2 weights:
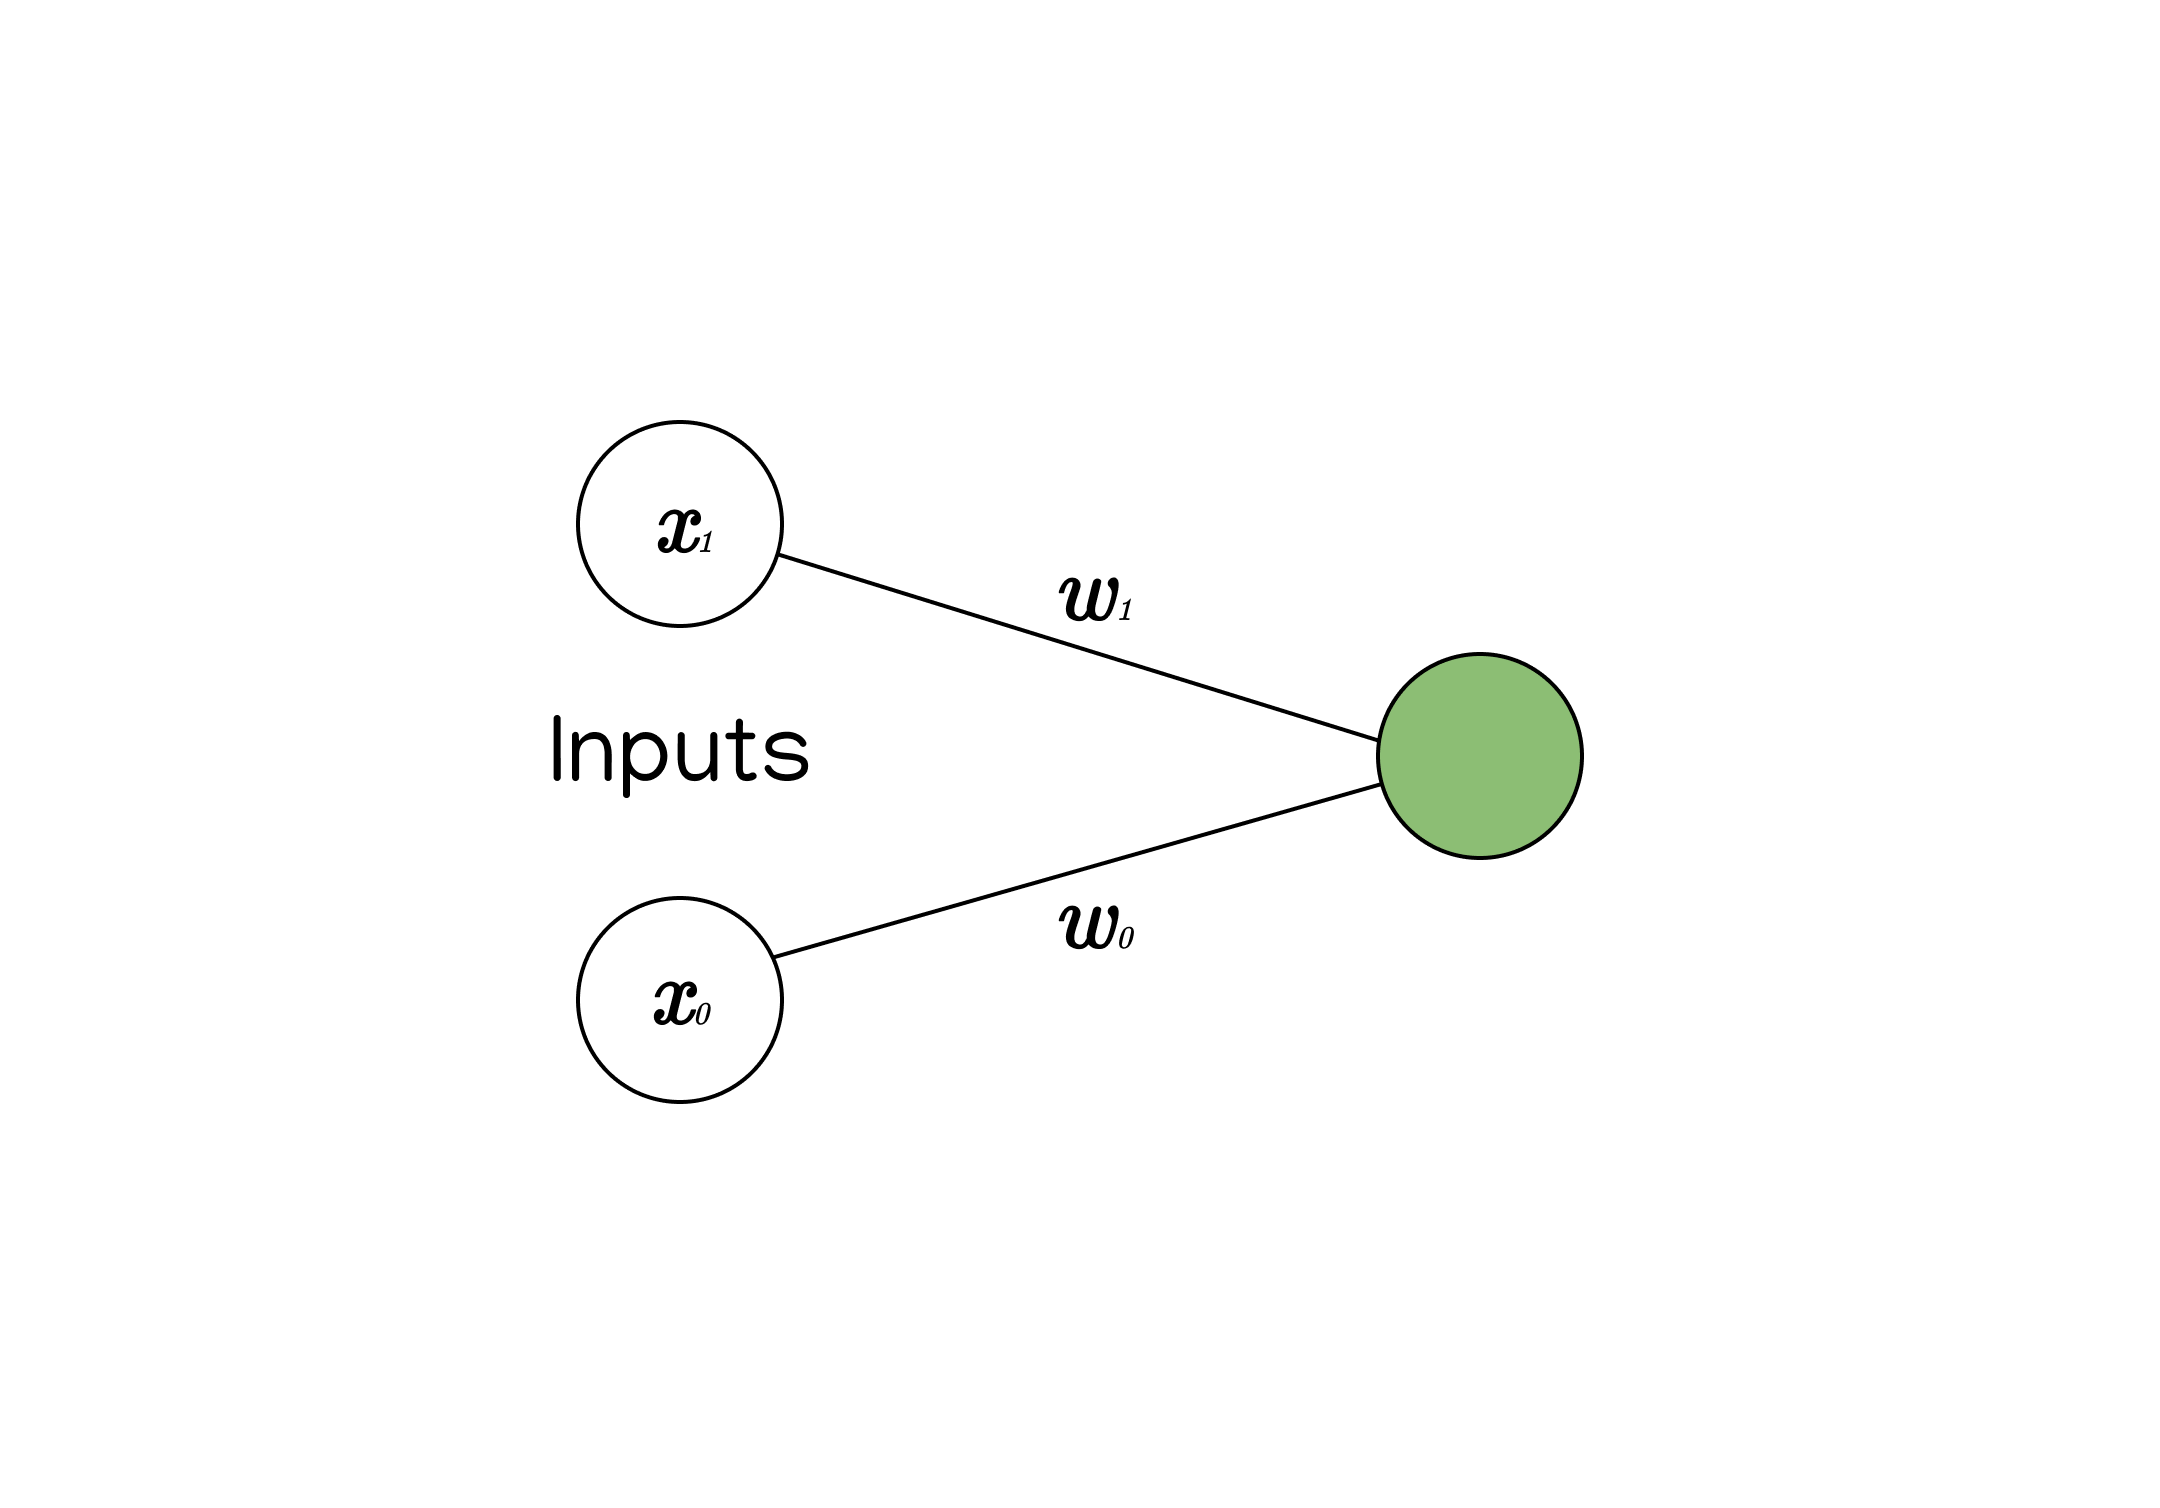
Like I said before, in order to calculate a neuron’s value with multiple inputs, we multiply each input by its respective weight, sum them up, and then add the bias.
So to calculate the value of the green neuron, we need to do:
$$ x_0 * w_0 + x_1 * w_1 + b $$
Coding a neuron
Alright - now that we’ve finally gotten through most of the basics for understanding how a neural network functions, we can start representing some of it with code. We’ll start very lightly by understanding how to represent a neuron and its components in code.
To represent a neuron in code, we could start by creating a class that holds the neuron’s components - mainly the neuron’s weights and its bias.
class Neuron:
    def __init__(self, num_inputs):
        # initialize self.weights
        # initialize self.bias
You can see in the constructor method that the class will take the number of inputs (num_inputs) as an argument - this is because the number of weights that we initialize depends on the number of inputs (one weight for every input).
For now, we’ll start by initializing the weights and bias randomly.
import numpy as np
class Neuron:
    def __init__(self, num_inputs):
        self.weights = np.random.randn(num_inputs)
        self.bias = np.random.randn()
We can also add a method to calculate the neuron’s value by multiplying its weights and inputs together. We’ll use a dot product for this. If you’re unsure about how dot products work, don’t worry - I’ll explain them more thoroughly in the next post.
import numpy as np
class Neuron:
    def __init__(self, num_inputs):
        self.weights = np.random.randn(num_inputs)
        self.bias = np.random.randn()

    def calculate(self, inputs):
        return np.dot(inputs, self.weights.T) + self.bias
You’ll see the limitations of some of this code as we get more in-depth in the following chapters of the series, but for now, this is a good start for representing a neuron.
Keep an eye out for the next post where we’ll take a deeper dive into neuron code and representing neurons in the context of layers.